Today I am so happy to share an interview with you from the blogger/crafter/force-to-be-reckoned-with Lee Meredith a.k.a Leethal! Click here for the interview! I’m particularly excited because it was Lee’s blog and go-getter attitude that inspired me to start this blog and hold my first blogfest – 12 Days of Craftmas. Not only has Lee given us a really generous look into her creative life and inspiration but she has also contributed an amazing tutorial on cold brew coffee, perfect for making a refreshing summer treat. I’m making mine a latte! My poor battered conscious and weary purse will be so happy that I won’t be relying on St*rb&cks for my fix anymore :)
How to make Cold Brewed Coffee Concentrate!
by Leethal!
Cold brewed coffee is by far the best way to stay caffeinated in the summertime – I first read about it a few years ago when a blog linked to this New York Times article and I’ve been making it every summer since. My way is super simple, and there are methods out there that might be a wee bit better, but I’ve been doing it this easy way for years and my coffee tastes oh so delicious! None of the bitterness that you taste in regular drip-brewed coffee that’s been cooled; be sure to taste it before adding any sugar, because you probably won’t need any!
You’ll need:
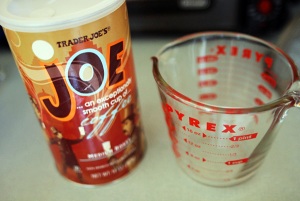
- ground coffee beans
- a container in which to brew – either something with measurements on it, or an additional measuring cup, and either with a lid or with plastic wrap to cover it
- a spoon to stir
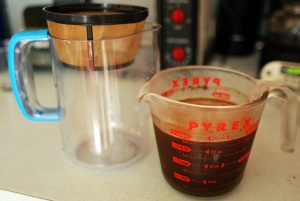
- a second container to store the final concentrate – a small pitcher is good
- a reusable coffee filter or some kind of strainer fine enough for coffee grounds, or a strainer with cheesecloth to strain the grounds

The concentrate gets combined with water (or milk) for drinkable iced coffee, so however much you make will be about half the amount of total coffee you’ll have to drink. I usually make enough for a few days, just for myself, but if I were making it to share with guests I would use a larger container than I did here and make more concentrate.
Step 1: Measure grounds into brewing container (as much as you want this measurement will be about one fifth the total brewing mixture that will go into this container).

Step 2: Add water – about four times as much as the amount of coffee grounds. So if you’re adding it into the same measuring cup, your total measurement now should be approximately five times as much as the coffee grounds measurement. Stir mixture well, then cover and place in refrigerator.


Step 3: Let sit in refrigerator for at least 3-4 hours, or up to overnight – I usually leave it overnight. I’ve never experienced it being too brewed, and I’ve left it over 24 hours, though it’s probably better to keep it under 12 hours.

Step 4: Pour brew mixture through strainer or filter into the concentrate container. You may need to move the filter around to strain all the concentrate through, depending on your filter/strainer.
That’s it, all the steps, now you have your coffee concentrate! Keep it in the fridge as is, or you could mix the whole batch into drinkable iced coffee and store it that way. To make iced coffee, mix equal parts concentrate and water, plus as much ice as you like (try out varying mixture ratios, as maybe you’ll like it stronger or weaker). To make a cold brewed milky iced coffee, similar to an iced latte, combine equal parts concentrate and milk (or soy milk, my favorite!). Try adding some chocolate syrup for a drink similar to an iced mocha, or a flavor syrup (like vanilla or hazelnut, etc) for a sweet cold coffee drink!


Pingback: A Midsummer Day’s Dream – Day 14! « LightingLittleFires
Pingback: do stuff! » Catching Up – coffee, interview, and a bunch of links!
Pingback: do stuff! » June 22nd – July 8th photos
Pingback: Cold Brewing | Im so addicted to handmades